
Part 1 - Setting up Pelican - Installation and Theme (2020)
This article is a part of a series of articles for web development using pelican. So, if you haven’t read the previous article, please check it out by clicking the link below.
Creating and deploying static websites using Markdown and the Python library Pelican
Pelican is a static site generator, written in Python.
Features of Pelican
- Articles (e.g., blog posts) and pages (e.g., “About”, “Projects”, “Contact”)
- Comments, via an external service (Disqus). If you prefer to have more control over your comment data, self-hosted comments are another option. Check out the Pelican Plugins repository for more details.
- Theming support (themes are created using Jinja2 templates)
- Publication of articles in multiple languages
- Atom/RSS feeds
- Code syntax highlighting
- Import from WordPress, Dotclear, or RSS feeds
- Integration with external tools: Twitter, Google Analytics, etc. (optional)
- Fast rebuild times thanks to content caching and selective output writing
Setting up Pelican
Project Structure: Create any folder for your project. For example web_development
$ mkdir web_development
$ cd web_development
1. Installation and Configuration
First, install virtualenv via pip and then create a virtual environment for your project.
$ pip install virtualenv
$ virtualenv .venv
Activate the virtual environment
$ source .venv/bin/activate
Now, to install pelican and all packages and dependencies that we will be using later, we need to create a requirements.txt file
(.venv) $ touch requirements.txt
and paste the lines from this link: requirements.txt into the file.
Then just run the following command inside the virtual environment to install all these packages
(.venv) $ pip install -r requirements.txt
Let’s now run a quickstart configuration script for pelican.
(.venv) $ pelican-quickstart
Pelican asks a series of questions to help you get started by building required configuration files.
Welcome to pelican-quickstart v3.7.1.
This script will help you create a new Pelican-based website. Please answer the following questions so this script can generate the files needed by Pelican.
> Where do you want to create your new web site? [.] .
> What will be the title of this web site? Ayush Kumar Shah
> Who will be the author of this web site? Ayush Kumar Shah
> What will be the default language of this web site? [en] en
> Do you want to specify a URL prefix? e.g., http://example.com   (Y/n) n
> Do you want to enable article pagination? (Y/n) Y
> How many articles per page do you want? [10] 5
> What is your time zone? [Europe/Paris] Asia/Kathmandu
> Do you want to generate a Fabfile/Makefile to automate generation and publishing? (Y/n) Y
> Do you want an auto-reload & simpleHTTP script to assist with theme and site development? (Y/n) n
> Do you want to upload your website using FTP? (y/N) N
> Do you want to upload your website using SSH? (y/N) N
> Do you want to upload your website using Dropbox? (y/N) N
> Do you want to upload your website using S3? (y/N) N
> Do you want to upload your website using Rackspace Cloud Files? (y/N) N
> Do you want to upload your website using GitHub Pages? (y/N) y
> Is this your personal page (username.github.io)? (y/N) y
Done. Your new project is available at /Users/ayushkumarshah/Desktop/Blog_writing/web
While answering the questions, please keep these things in mind:
- Title and Author: Replace
Ayush Kumar Shahwith the title and author’s name that you want. Default language: You can set any language using the standard ISO 639.1 2 letter code.
Article Pagination: If you do not want to limit the number of articles on a page, enter n.
Time zone: Choose your timezone from the Wikipedia.
- Fabfile will help in further processes. So enter Y.
You may delete the Makefile as we will not be using it.
(.venv) $ rm Makefile
After successfully running the command, your directory should look like this:
web_development
    ├── content/
    ├── fabfile.py
    ├── output/
    ├── pelicanconf.py
    ├── publishconf.py
    └── requirements.txt
Let me tell you with the purpose of each of these files :
- content/ - directory that stored al the website content
- fabfile.py - script that helps us automate website generation and publishing
- output/ - directory which stores the HTML files of the generated static website
- pelicanconf.py - file containing all the configurations of the website publishconf.py - file containing additional website configurations used while publishing the website requirements.txt - contains all the packages and dependencies required
2. Generate and view your website
Till now, we have installed and configured Pelican successfully.
Let’s generate our first website and preview what it looks like. Make sure you are inside .venv environment.
Open fabfile.py and replace all instances of SocketServer by socketserver. (SocketServer is for python2).
# import SocketServer
import socketserver
...
# class AddressReuseTCPServer(SocketServer.TCPServer):
class AddressReuseTCPServer(socketserver.TCPServer):
Now, we are ready to generate and view our site.
(.venv) $ fab build
(.venv) $ fab serve
You may also run a single command equivalent to the 2 commands above:
(.venv) $ fab reserve
In case an error occurs, open
fabfile.pyagain and change the import line to
import SocketServer as socketserver
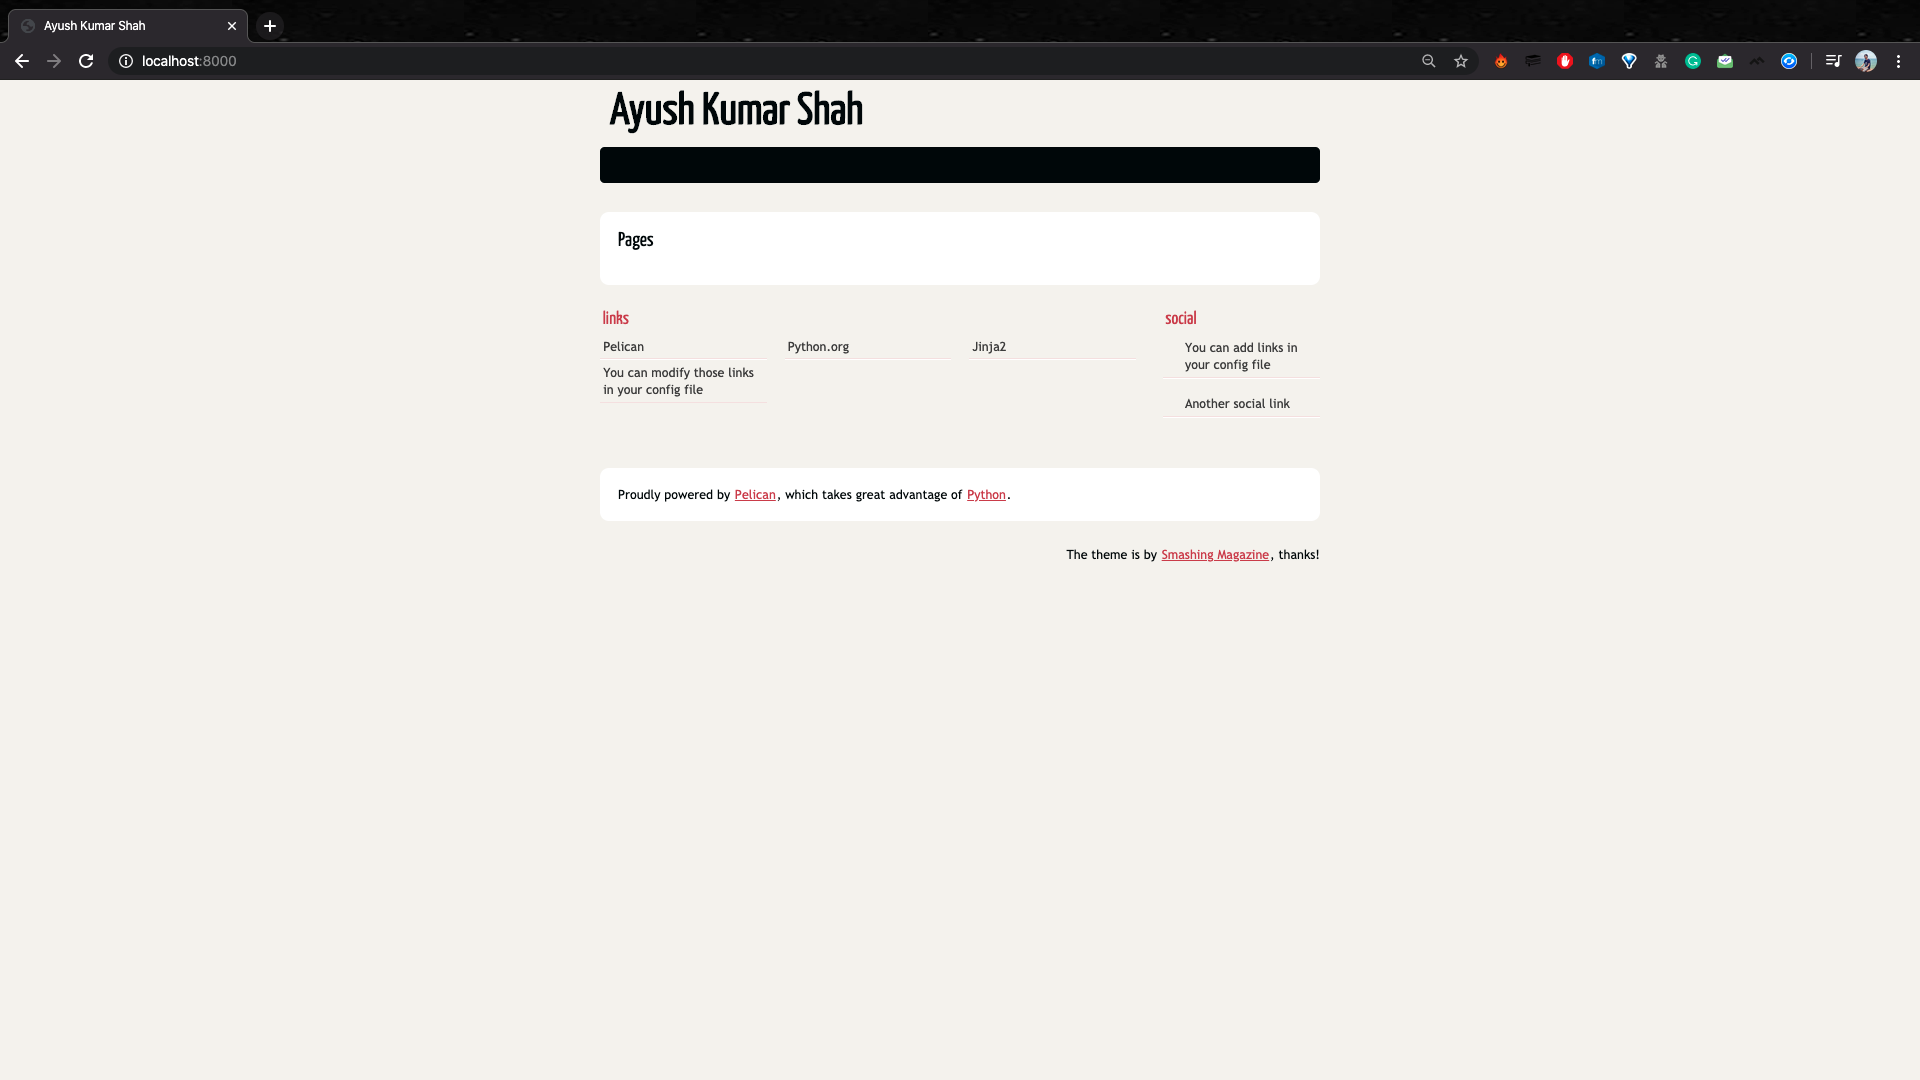
After running the fab command, you will notice HTML files generated inside the output folder. These files are the HTML files of your website.
Your website should be already running in port 8000 of your localhost. To view your website, open your browser and visit localhost:8000
Congratulations, you have generated your first website.
3. Installing Pelican Themes
Now that we have built our website, let’s make the design more beautiful and responsive. There are numerous Pelican themes to choose from. Both the live version of the themes and the repositories are available. You can check them out and select the one that suits your website. My favorite themes are Flex (live version), Pneumatic (live version) and Bulrush (live version). I am currently using the Bulrush theme with some custom modifications for my website.
I will demonstrate using the Flex theme.
First, open and clone the Flex repository or the repository of the theme you chose. Make sure you are inside the web_development directory.
(.venv) $ git clone https://github.com/alexandrevicenzi/Flex.git themes/Flex
Here, the 2nd argument is the destination directory of the theme in your project. You can replace themes/Flex by themes/name_of_theme.
Now, specify the path of your theme in the configuration file pelicanconf.py by adding the following line:
THEME = 'themes/Flex'
Although Flex theme requires no additional plugin, most of the themes require various Pelican plugins. So, let’s download the pelican-plugins into your project. Note that you may skip this step if you want to use Flex theme.
(.venv) $ git clone https://github.com/getpelican/pelican-plugins.git
Now, add the path of the plugins in pelicanconf.py in a similar way as before by adding the following lines:
PLUGIN_PATHS = ['./pelican-plugins']
Also, add a line specifying a list of plugins required in your theme. You can view the name of plugins required in the documentation of the GitHub repository of the corresponding theme. Three most common plugins required by most of the themes are listed below. You can add the following line in the same file pelicanconf.py.
PLUGINS = ['sitemap', 'post_stats', 'feed_summary']
Some themes may require additional plugins, for which you have to search the documentation.
Another way to find the plugin name required is to just skip it for a while and after everything is done, while trying to serve your website, you will get an error message stating the name of missing plugins. Then you can add these plugins in the pelicanconf.py file.
At this state, your directory structure should look like this:
web_development
    ├── content/
    ├── fabfile.py
    ├── output
        ├── ... (many HTML files)
    ├── themes
        ├── Flex/
    ├── pelican-plugins
        ├── ... (various plugin directories)
    ├── pelicanconf.py
    ├──publishconf.py
    └──requirements.txt
If it doesn’t, then you probably did something wrong.
So, by now we have successfully installed the Flex theme on our website. You
Flex Configurations
We can check our new theme by generating and serving our new website again.
Close the previous process i.e. fab reserve if it is still running by pressing Ctrl+C or Cmd+C. Now,
(.venv) $ fab reserve
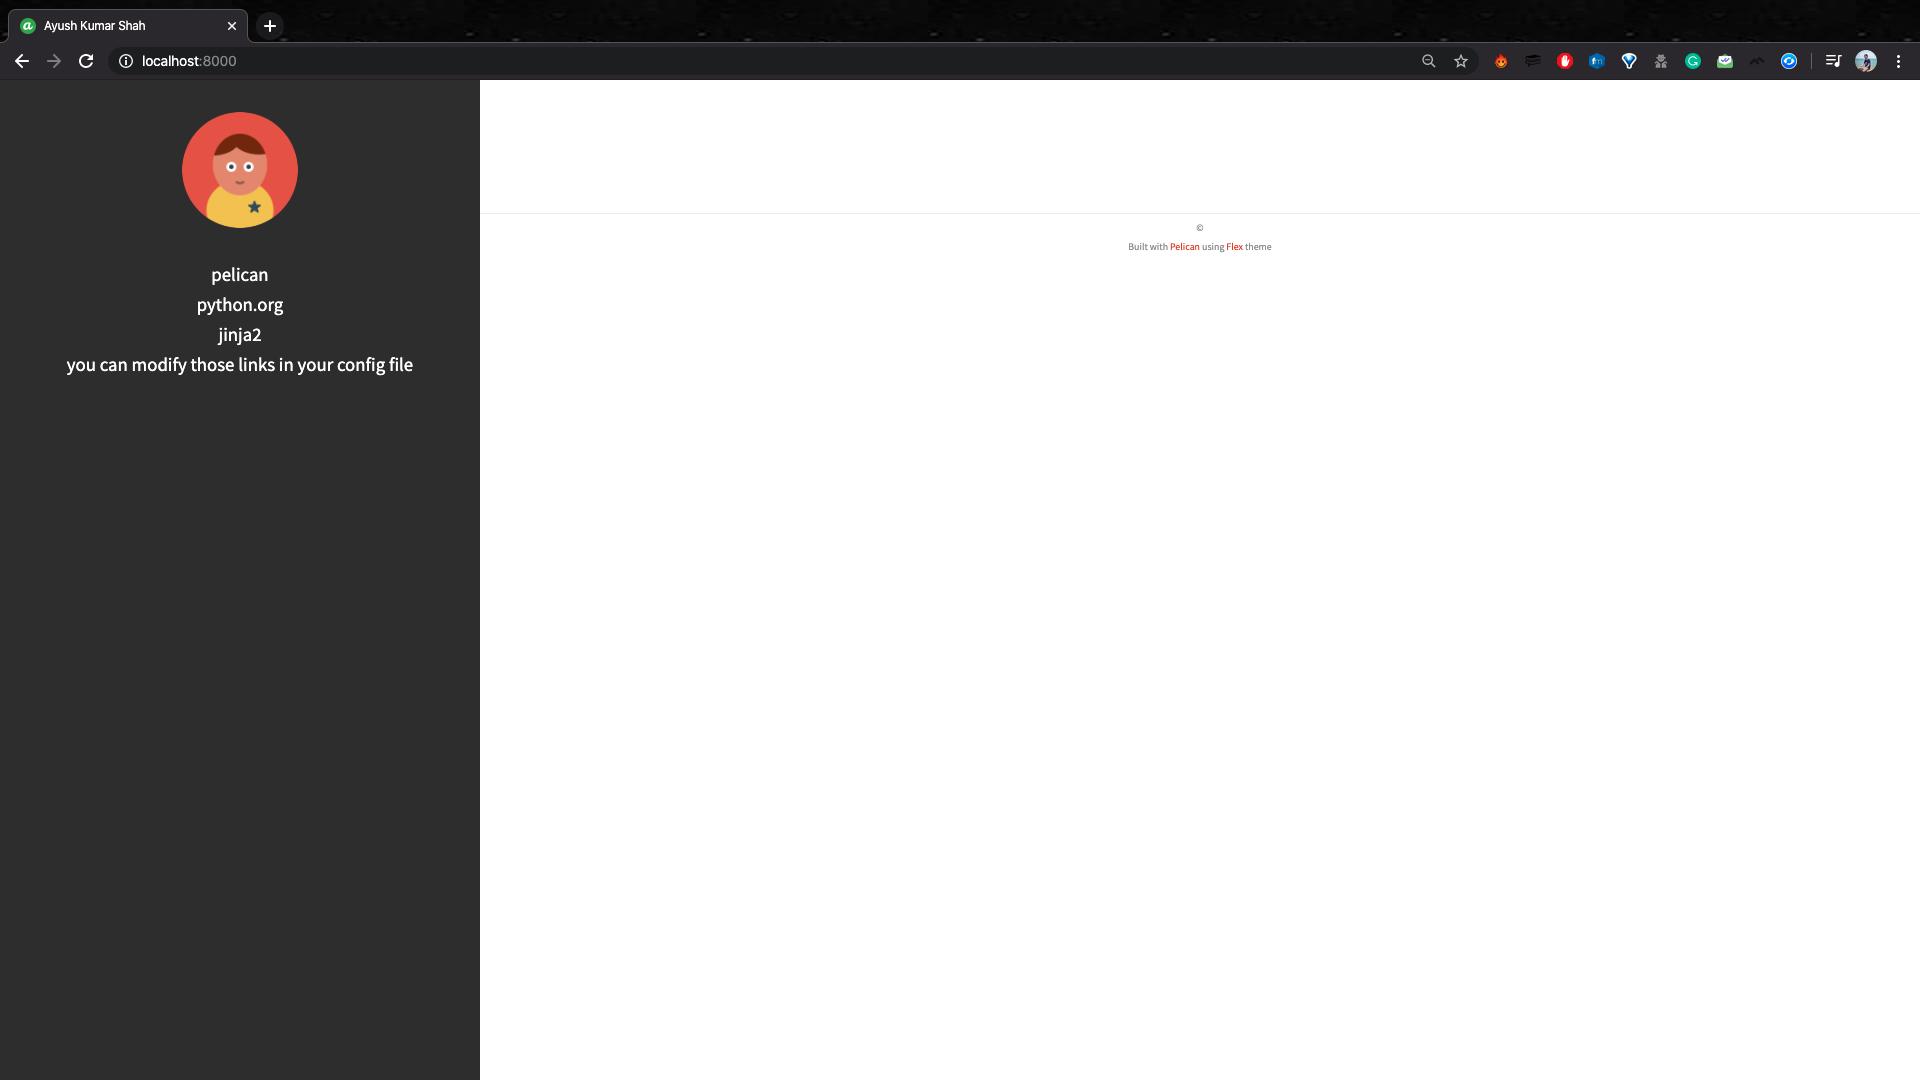
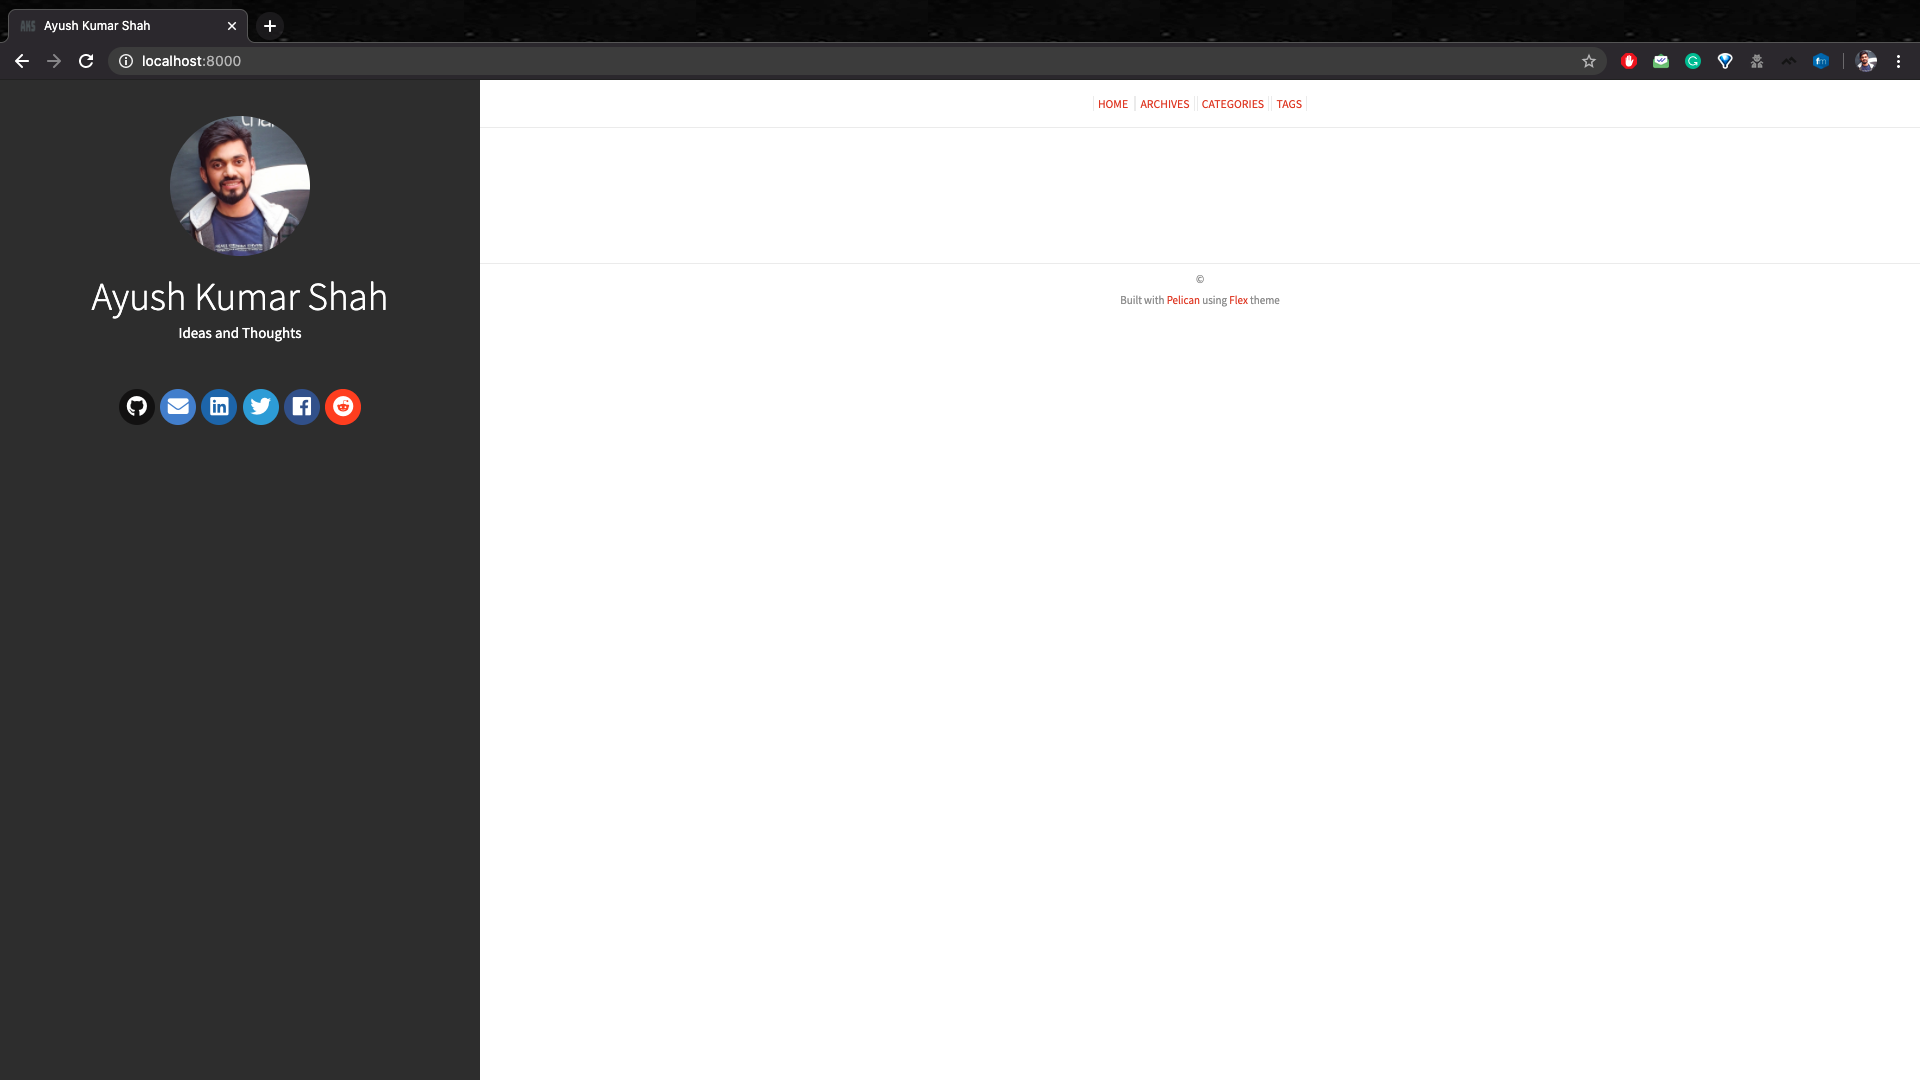
Open your browser and visit localhost:8000
You should see your website in a new theme.
However, it is not customized to include your profile. So, let’s customize the site by adding some attributes of the theme.
First, let’s create some folders inside the content directory.
(.venv) $ mkdir content/images
(.venv) $ mkdir content/extra
Let’s replace the default profile photo and favicon by your own.
Copy the profile image
profile.pngand the collection of favicon files likefavicon.ico, favicon-16x16.png, etc into the images directory you just created.
Note: A favicon is a small pixel icon that appears at the top of the browser before the site name. It serves as branding for your website. You can create one using various tools online like realfavicongenerator or the favicon generator from websiteplanet (Thanks to Estefany for mentioning this site which allows image size upto 5 MB)
Different themes have different attributes or configurations.
Check the documentation or the README.md file of the respective theme. For Flex theme, a sample pelicanconfig.py can be found inside the docs folder. Check it for reference and also compare it with the live version of the theme. You can find more examples of the configurations in the Flex Wiki for reference.
I will demonstrate using a sample configuration for this theme. For that, add the following lines in your pelicanconfig.py file.
### Flex configurations

PLUGINS = ['sitemap', 'post_stats', 'feed_summary']
SITEURL = 'http://localhost:8000'
SITETITLE = 'Ayush Kumar Shah'  # Replace with your name
SITESUBTITLE = 'Ideas and Thoughts'
SITELOGO = '/assets/img/sample/profile.png'
FAVICON = '/assets/img/sample/favicon.ico'

# Sitemap Settings
SITEMAP = {
    'format': 'xml',
    'priorities': {
        'articles': 0.6,
        'indexes': 0.6,
        'pages': 0.5,
    },
    'changefreqs': {
        'articles': 'monthly',
        'indexes': 'daily',
        'pages': 'monthly',
    }
}

# Add a link to your social media accounts
SOCIAL = (
    ('github', 'https://github.com/ayushkumarshah'),
    ('envelope', 'mailto:[email protected]'),
    ('linkedin','https://np.linkedin.com/in/ayush7'),
    ('twitter','https://twitter.com/ayushkumarshah7'),
    ('facebook','https://www.facebook.com/ayushkumarshah'),
    ('reddit','https://www.reddit.com/user/ayushkumarshah')
)

STATIC_PATHS = ['images', 'extra']

# Main Menu Items
MAIN_MENU = True
MENUITEMS = (('Archives', '/archives'),('Categories', '/categories'),('Tags', '/tags'))

# Code highlighting the theme
PYGMENTS_STYLE = 'friendly'

ARTICLE_URL = '{date:%Y}/{date:%m}/{slug}/'
ARTICLE_SAVE_AS = ARTICLE_URL + 'index.html'

PAGE_URL = '{slug}/'
PAGE_SAVE_AS = PAGE_URL + 'index.html'

ARCHIVES_SAVE_AS = 'archives.html'
YEAR_ARCHIVE_SAVE_AS = '{date:%Y}/index.html'
MONTH_ARCHIVE_SAVE_AS = '{date:%Y}/{date:%m}/index.html'

# Feed generation is usually not desired when developing
FEED_DOMAIN = SITEURL
FEED_ALL_ATOM = 'feeds/all.atom.xml'
CATEGORY_FEED_ATOM = 'feeds/%s.atom.xml'
TRANSLATION_FEED_ATOM = None
AUTHOR_FEED_ATOM = None
AUTHOR_FEED_RSS = None

# HOME_HIDE_TAGS = True
FEED_USE_SUMMARY = True
You may remove the LINKS variable from the configuration file pelicanconfig.py as you don’t need those links. We can check our new configuration by generating and serving our website again.
Close the previous process i.e. fab reserve if it is still running by pressing Ctrl+C or Cmd+C. Now,
(.venv) $ fab reserve
Open your browser and visit localhost:8000
You should see your website with your new configuration. Feel free to modify it as per your liking.
Congratulations, you have completed the basic setup for Pelican.
However, your site has no content. Start writing content in the part 2 of the article.
If you have any confusion in any article, feel free to comment on your queries. I will be more than happy to help. I am also open to suggestions and feedbacks.
Also, you can use my GitHub repository for my blog post: ayushkumarshah.github.io as a reference in any point of the article. I have followed the same steps mentioned in this series to create my blog website that you are seeing right now.
If you want to visit any specific parts of the article, you can do so from the links below.
- Part 1: Setting up Pelican - Installation and Theme
- Part 2: Writing content using Markdown
- Part 3: Hosting your website to GitHub Pages and custom domain
- Part 4: Setting up Travis-CI for automating deployment
- Part 5: Integrate Disqus comments and Google Analytics with Pelican
Or, go to the home-page of the article.