
Part 2 - Writing content using Markdown (2020)
This article is a part of a series of articles for web development using pelican. So, if you haven’t read the previous articles, please check it out by clicking the links below.
Creating and deploying static websites using Markdown and the Python library Pelican
Now that you have set up your website, the next step is to start writing some content – articles, blogs, about page, contact page, etc. We will use Markdown for writing any content you create. If you have not heard about Markdown, don’t worry as I will guide you with examples.
Create directories and files
First, let us create the required directories for articles and pages.
(.venv) $ mkdir content/articles
(.venv) $ mkdir content/pages
Now, let’s create a file for your first article inside the articles directory. Note that the touch command is being used only to create a file. You can create a file without using any command too. It’s up to you.
(.venv) $ touch content/articles/first_article.md
Also, create files for about, contact, and 404 error page.
(.venv) $ touch content/pages/about.md content/pages/contact.md content/pages/404.md
At this point, your project structure should look like:
web_development
        ├── content
            ├── articles
                └── first_article.md
            ├── pages
                ├── 404.md
                ├── about.md
                └── contact.md
        ├── fabfile.py
        ├── output
            ├── ... (many html files)
        ├── themes
            ├── Flex/
        ├── pelican-plugins
            ├── ... (various plugin directories)
        ├── pelicanconf.py
        ├──publishconf.py
        └──requirements.txt
Start Writing Articles
Define metadata for article
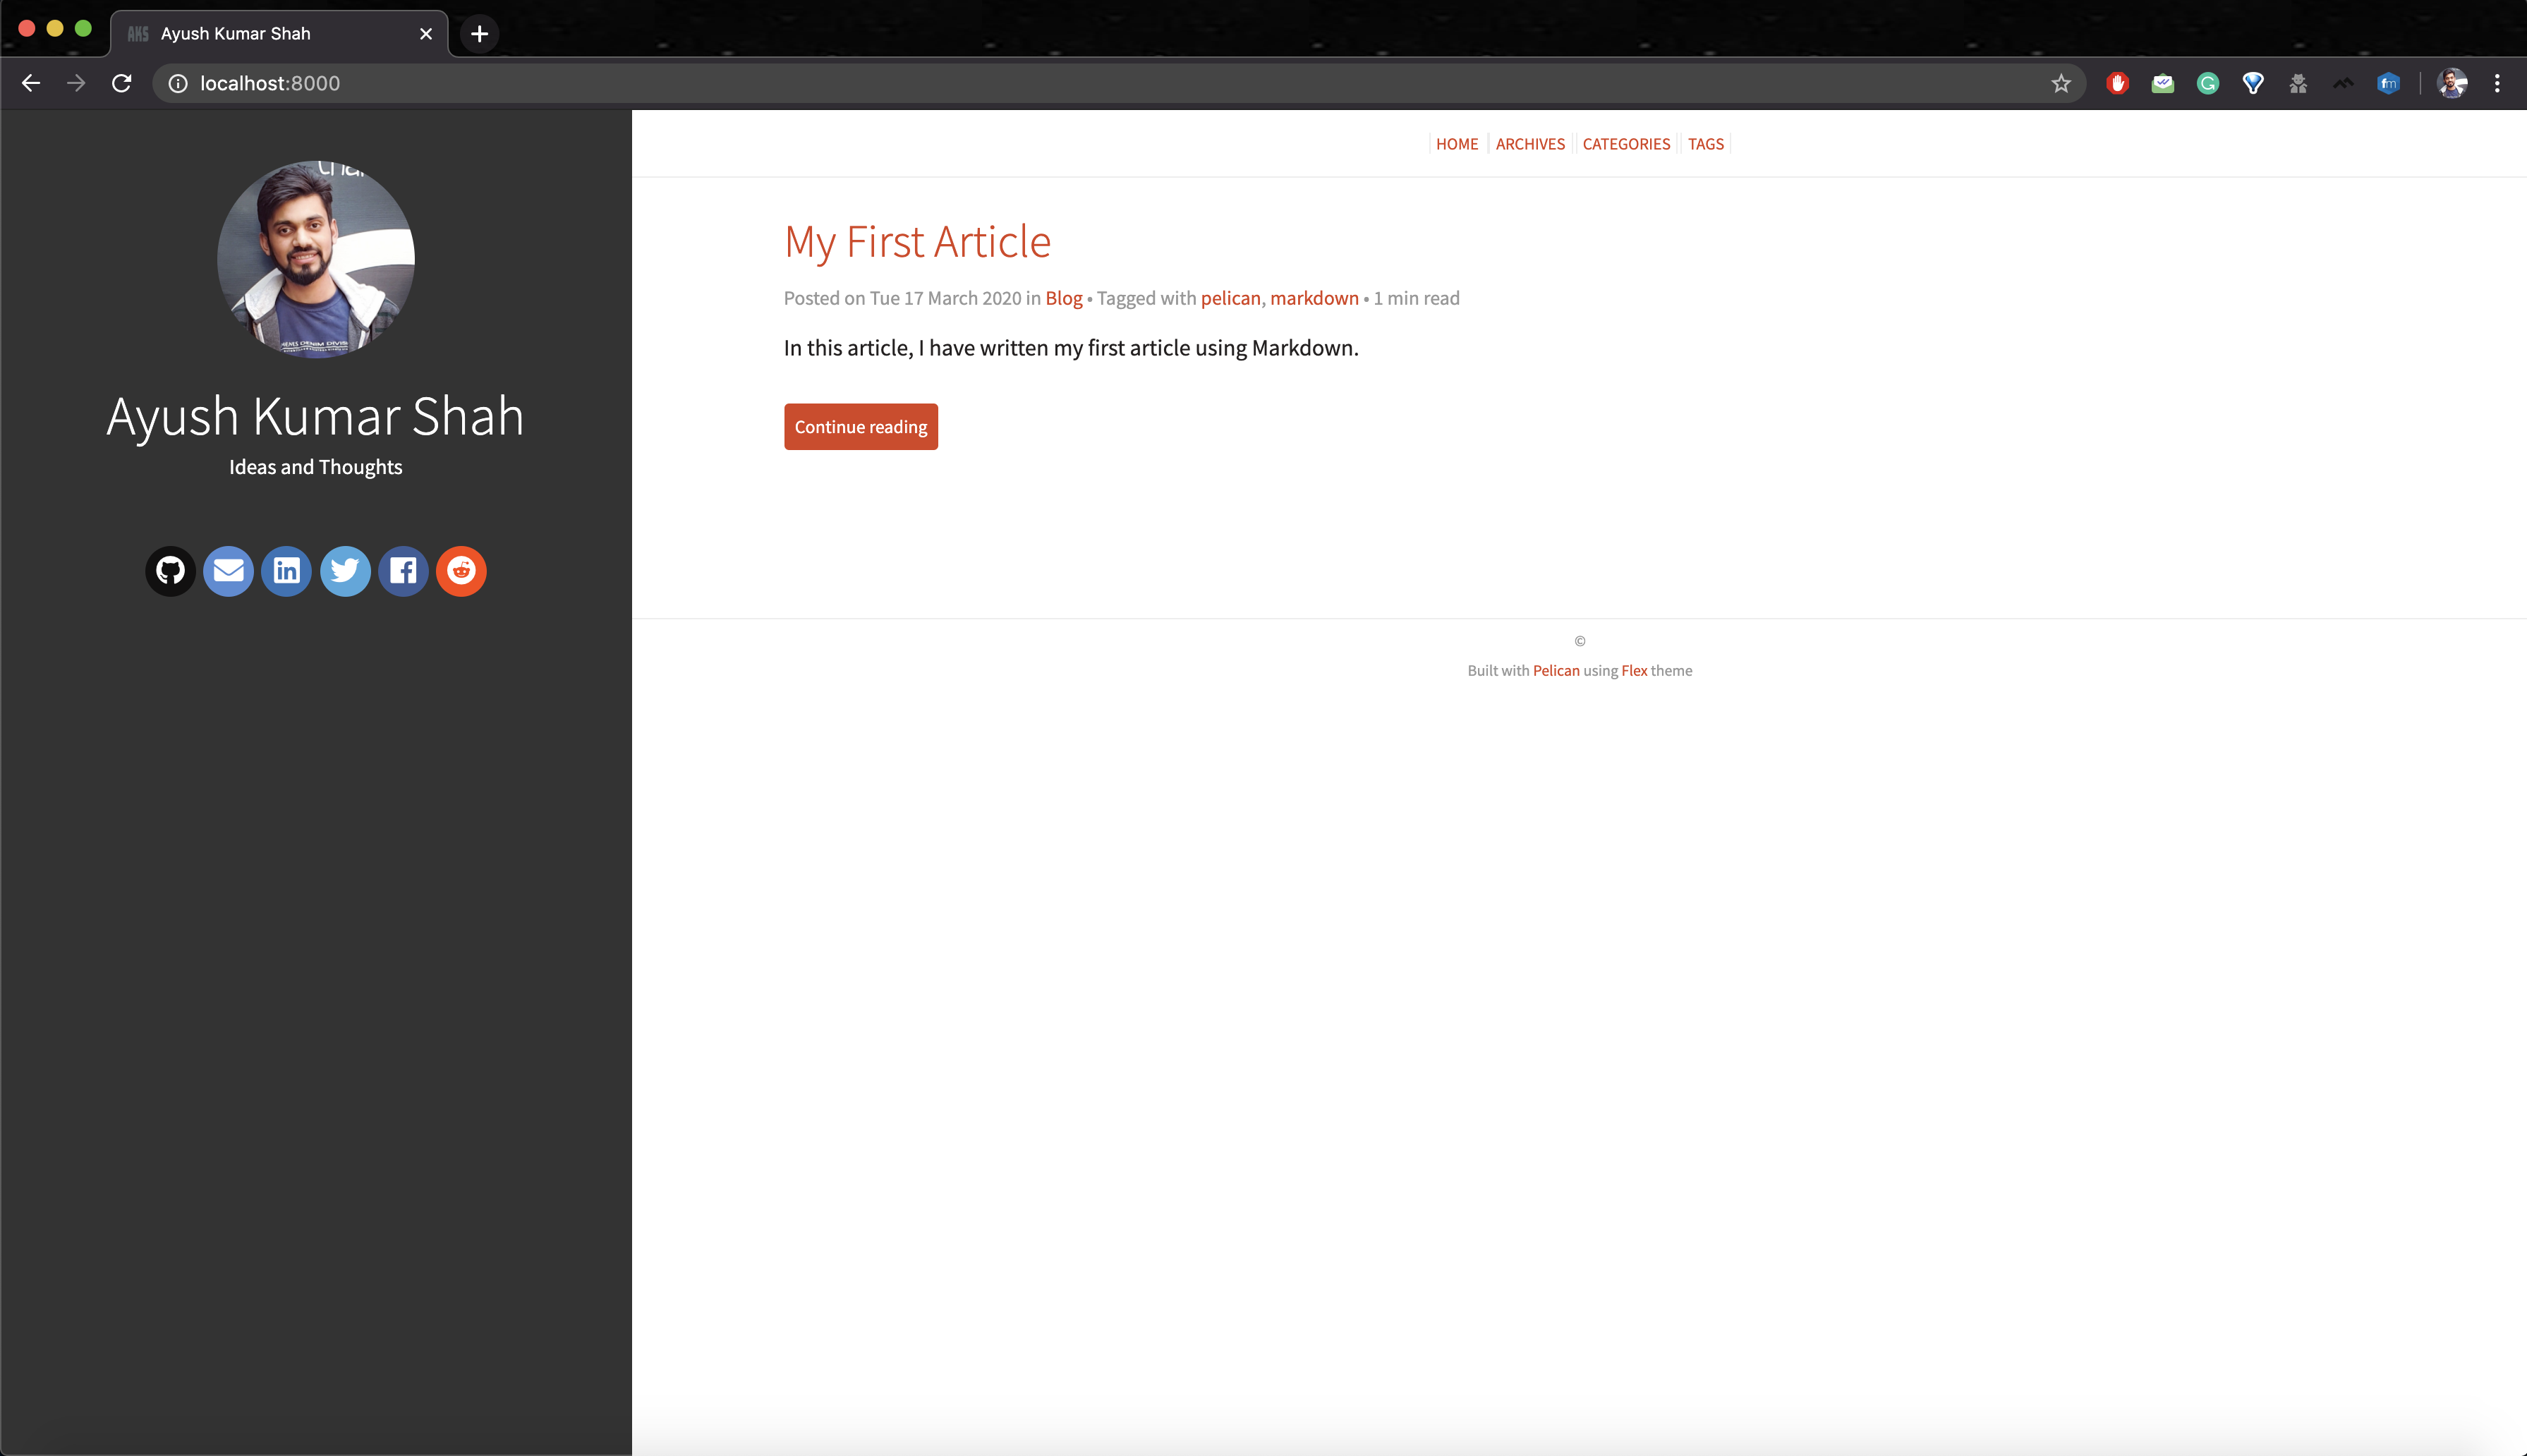
Before writing the actual content, we need to define the metadata for the article. Metadata carries important information about your article. Open the file first_article.md and add the following metadata lines:
Title: My First Article
Date: 2020-03-17 00:00
Modified: 2020-03-17 00:00
Category: Blog
Slug: first-article
Summary: In this article, I have written my first article using Markdown.
Tags: pelican, markdown
Authors: Ayush Kumar Shah
Status: published
These keywords are pretty much self-explanatory. I will just explain the new ones.
Slug defines the name of the HTML file to be generated.
Status: Choose one option among draft, published, or hidden.
draft: In this mode, the article is not shown on the main page but can be viewed by visiting localhost:8000/drafts/first-article after serving the site (i.e. running this fab reserve). It is used to show to your friends while writing before publishing during the developing stage.
published: In this mode, the article is shown on the main page after serving the site. localhost:8000/2020/03/first-article.
hidden: In this mode, the article is just not shown on the website.
Write article content
Useful tip: Use VSCode as a text editor to manage your project and write content as you can preview .md files (content files written in markdown) in real-time directly using the Preview functionality. Hence, it becomes easy for you to view how your content will look like in real-time.
Now add the following lines in the file first_article.md just below the metadata defined above.
This is an example from [https://markdown-it.github.io/](https://markdown-it.github.io/)
---
# h1 Heading
## h2 Heading
### h3 Heading
#### h4 Heading
##### h5 Heading
###### h6 Heading
## Horizontal Rules
___
---
***
## Emphasis
**This is bold text**
__This is bold text__
*This is italic text*
_This is italic text_
~~Strikethrough~~
## Blockquotes
> Blockquotes can also be nested...
>> ...by using additional greater-than signs right next to each other...
> > > ...or with spaces between arrows.
## Lists
Unordered
+ Create a list by starting a line with `+`, `-`, or `*`
+ Sub-lists are made by indenting 2 spaces:
- Marker character change forces new list start:
* Ac tristique libero volutpat at
+ Facilisis in pretium nisl aliquet
- Nulla volutpat aliquam velit
+ Very easy!
Ordered
1. Lorem ipsum dolor sit amet
2. Consectetur adipiscing elit
3. Integer molestie lorem at massa
## Code
Inline `code`
Indented code
// Some comments
line 1 of code
line 2 of code
line 3 of code
Block code "fences"
```
Sample text here...
```
Syntax highlighting
``` python
numbers = [9, 8, 4, 1, 5]
for i, number in enumerate(numbers):
print (i, number)
message = "Hello World"
hello(message)
def hello(message):
print (message)
```
## Tables
| Option | Description |
| ------ | ----------- |
| data | path to data files to supply the data that will be passed into templates. |
| engine | engine to be used for processing templates. Handlebars is the default. |
| ext | extension to be used for dest files. |
Right aligned columns
| Option | Description |
| ------:| -----------:|
| data | path to data files to supply the data that will be passed into templates. |
| engine | engine to be used for processing templates. Handlebars is the default. |
| ext | extension to be used for dest files. |
## Links
[link text](http://dev.nodeca.com)
[link with title](http://nodeca.github.io/pica/demo/ "title text!")
## Images


You can view the complete Markdown cheatsheet for reference.
Now, let’s view how your article looks on the website.
Close the previous process i.e. fab reserve if it is still running by pressing Ctrl+C or Cmd+C. Then,
(.venv) $ fab reserve
Open your browser and visit localhost:8000
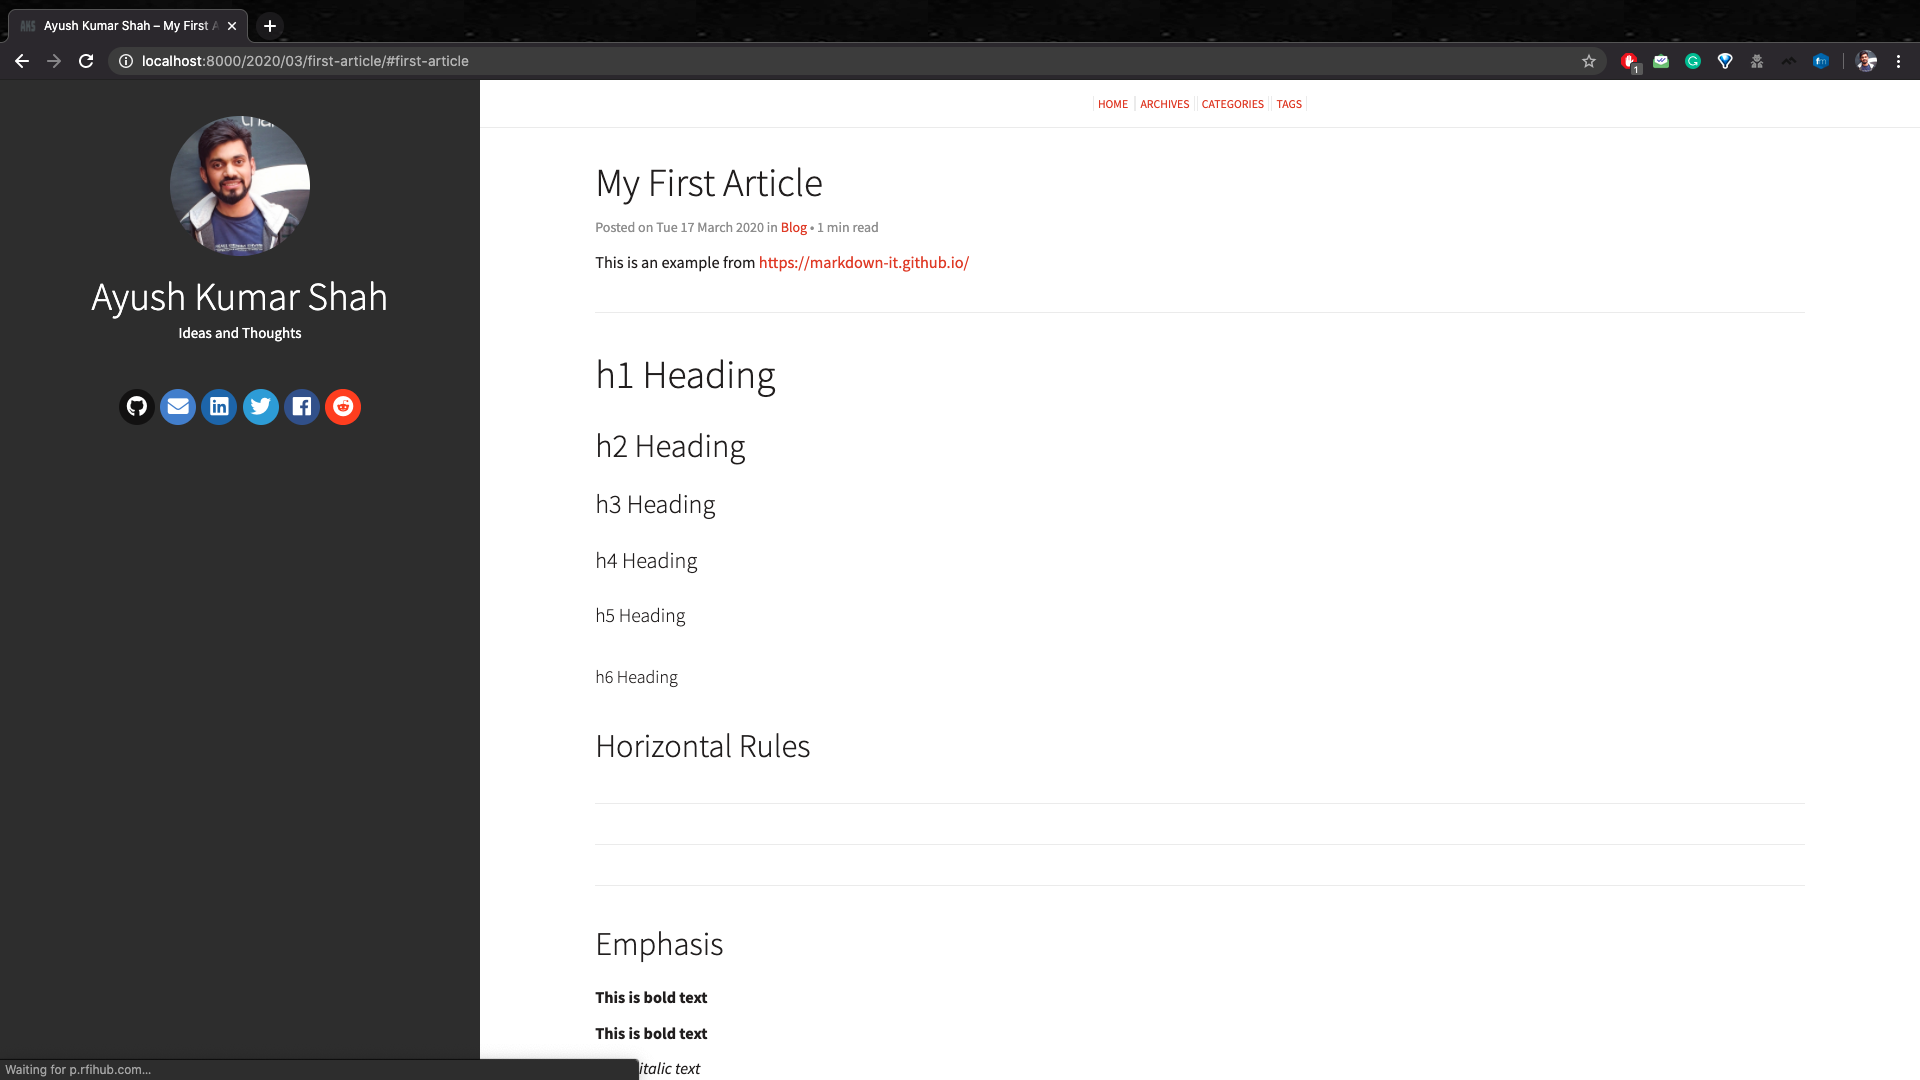
Congratulations, your first article has been published on your website. It was as simple as that. Compare the article output in the website as shown in the image above and the markdown code to understand how the code works.
Start Writing Pages
Now, let’s create our pages. Pages are more permanent and don’t require detailed metadata like the articles. Example: an about me page. We have added the links to the pages in the navigation bar.
About page
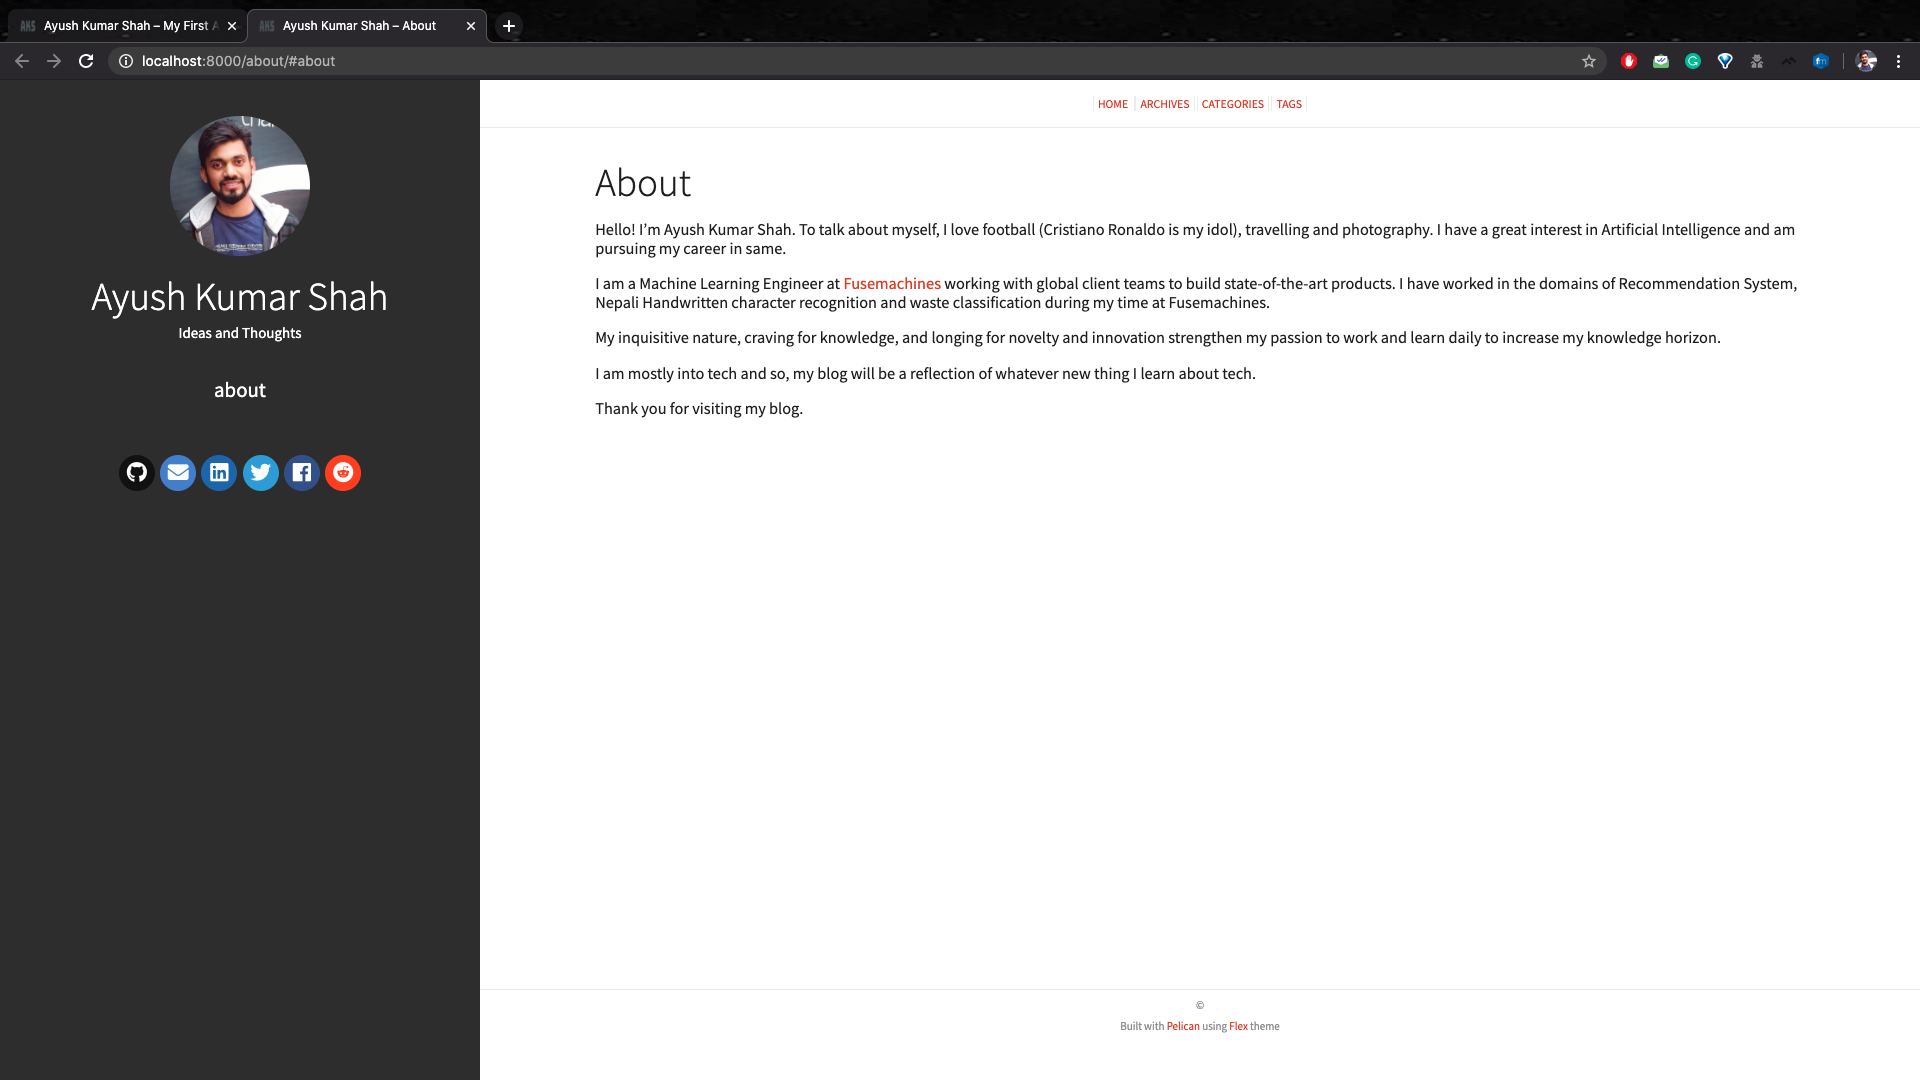
Open about.md and add the following metadata lines as you did before. As you can see the difference as it is not as detailed as before.
Title: About
Date: 2020-03-18 08:00
Modified: 2020-03-18 08:00
Write the content for your about page using Markdown in the way you want to design the page. I have provided a simple example for my about page below.
Hello! I’m Ayush Kumar Shah. To talk about myself, I love football (Cristiano Ronaldo is my idol), traveling, and photography. I have a great interest in Artificial Intelligence and am pursuing my career in the same.

I am a Machine Learning Engineer at [Fusemachines](https://www.fusemachines.com) working with global client teams to build state-of-the-art products. I have worked in the domains of Recommendation System, Nepali Handwritten character recognition, and waste classification during my time at Fusemachines.

My inquisitive nature, craving for knowledge, and longing for novelty and innovation strengthen my passion to work and learn daily to increase my knowledge horizon.

I am mostly into tech and so, my blog will be a reflection of whatever new thing I learn about tech.

Thank you for visiting my blog.
Contact page
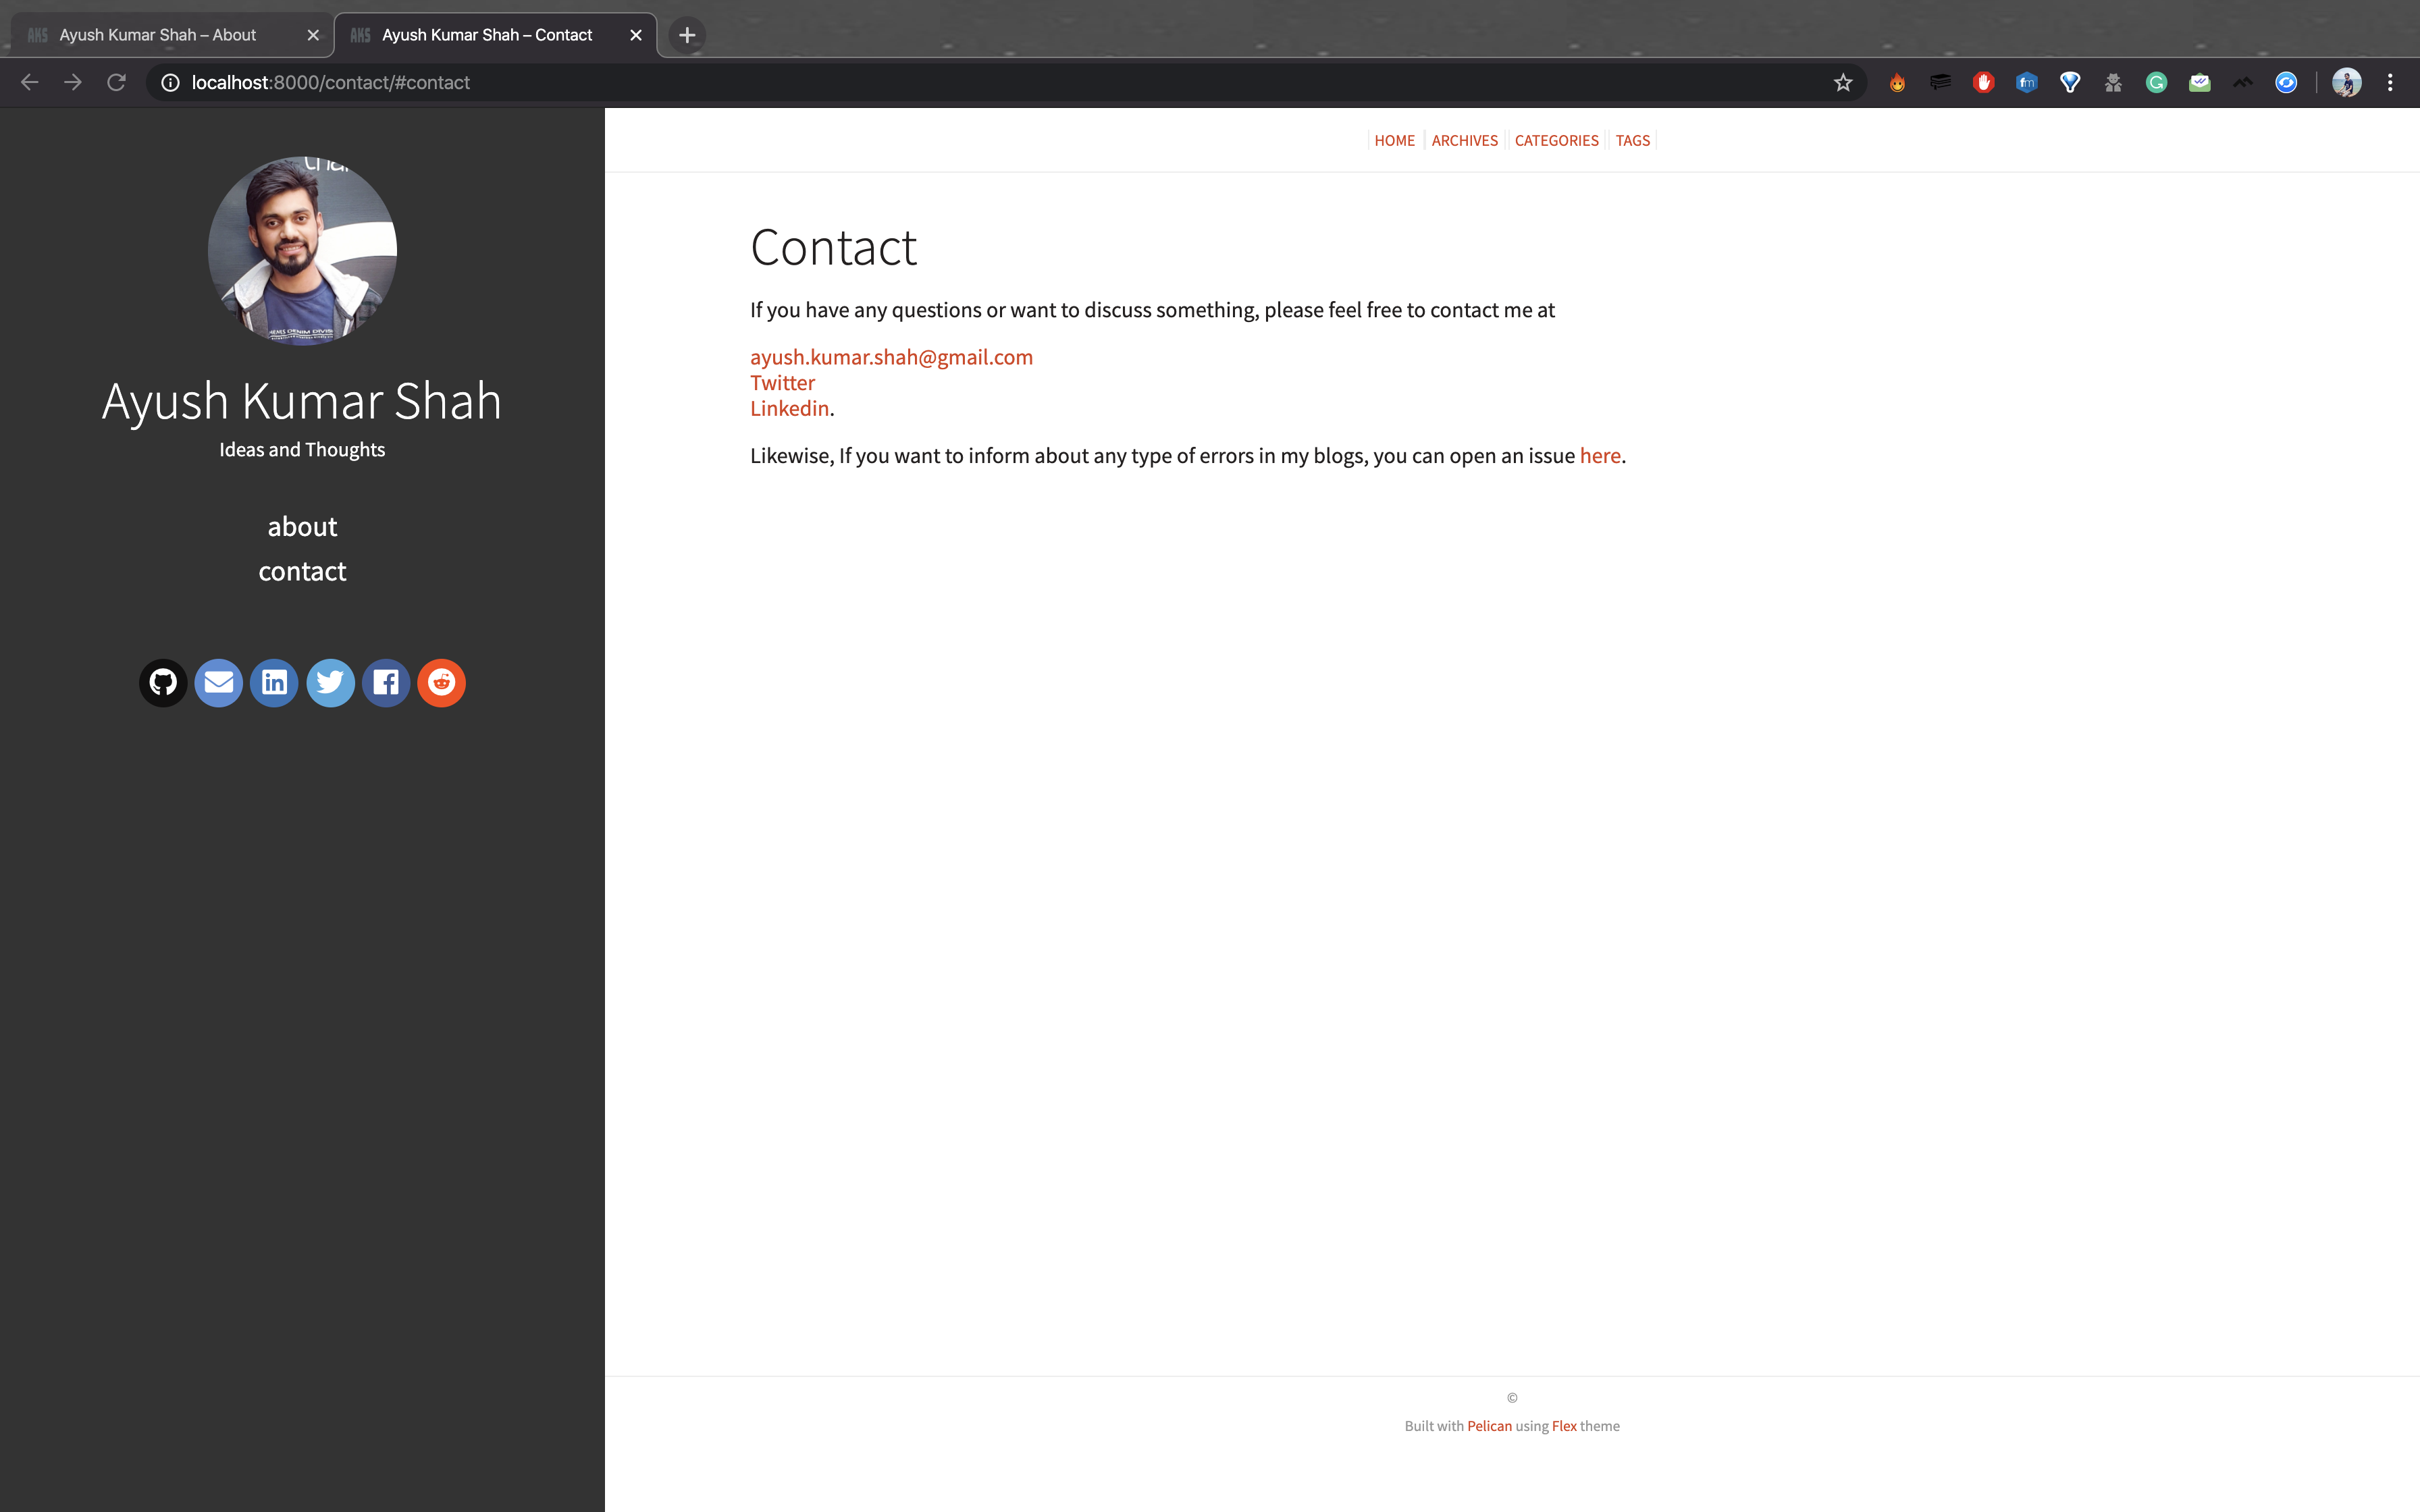
You can configure your contact.md file similarly. Have a look at a simple example below and create a similar one.
Title: Contact
Date: 2020-03-18 03:27
Modified: 2020-03-18 03:27
Slug: contact

If you have any questions or want to discuss something, please feel free to contact me at
[[email protected]](mailto:[email protected])
[Twitter](https://twitter.com/ayushkumarshah7)
[Linkedin](https://np.linkedin.com/in/ayush7).

Likewise, if you want to inform about any type of error in my blogs, you can open an issue [here](https://github.com/ayushkumarshah/ayushkumarshah.github.io/issues/new).
Finally, let’s define a page for error as well. Open 404.md and add the following lines
Title: Not Found
Status: hidden
Save_as: 404.html

Sorry, that page doesn't seem to exist. Please double-check the address or
head to the [home page][1].

[1]: {index}
Finally, your site is ready. You may now add more articles by creating more .md files into the content/articles/ directory and follow similar steps.
Although your site has been built, it is not publicly available. Learn how to host your site in GitHub pages or a custom domain in part 3 of the article.
If you have any confusion in any article, feel free to comment on your queries. I will be more than happy to help. I am also open to suggestions and feedbacks.
Also, you can use my GitHub repository for my blog post: ayushkumarshah.github.io as a reference in any point of the article. I have followed the same steps mentioned in this series to create my blog website that you are seeing right now.
If you want to visit any specific parts of the article, you can do so from the links below.
- Part 1: Setting up Pelican - Installation and Theme
- Part 2: Writing content using Markdown
- Part 3: Hosting your website to GitHub Pages and custom domain
- Part 4: Setting up Travis-CI for automating deployment
- Part 5: Integrate Disqus comments and Google Analytics with Pelican
Or, go to the home-page of the article.